If you’re tired of worrying about a wet basement every time it rains, it might be time to consider installing a sump pump. Dealing with a swampy basement can be an ongoing source of frustration and anxiety for homeowners, especially during rainy seasons or in areas prone to water-related issues.
A sump pump is a valuable addition to your home that not only offers practical benefits but also brings a profound sense of relief and peace of mind. In this blog post, we’ll take you through the ins and outs of installing a sump pump in your basement, step by step. Don’t worry; it’s not as daunting as it might sound. Let’s dive right into it!
What’s inside this article:
- The critical role a sump pump plays
- 8 easy-to-follow steps for installation
Keep reading to become a pro on a sump pump basement installation.
Why You Need a Sump Pump in The First Place
Before we jump into the installation process, let’s quickly discuss why having a sump pump in your basement is a smart move.
- Prevent Basement Flooding 🚿 : Sump pumps are your first line of defense against basement flooding. They remove excess water that accumulates in the sump pit, preventing it from seeping into your basement.
- Protect Your Belongings 🪑: A dry basement means your valuable possessions stay safe. No more ruined furniture, electronics, or cherished family mementos due to water damage.
- Avoid Mold and Mildew 🌱 : Excess moisture can lead to the growth of mold and mildew, which not only damages your home but also poses health risks to your family.
- Increase Property Value 🏡 : Installing a sump pump can enhance the resale value of your home, making it more attractive to potential buyers.
Now that we’ve established why a sump pump is essential, let’s move on to the installation process.
8 Steps to Installing a Sump Pump
Below we go over 8 easy steps to installing your sump pump like a champ.
#1–Gather The Right Tools and Materials 🧰
First things first, gather the necessary tools and materials for the job. You’ll need the following items:
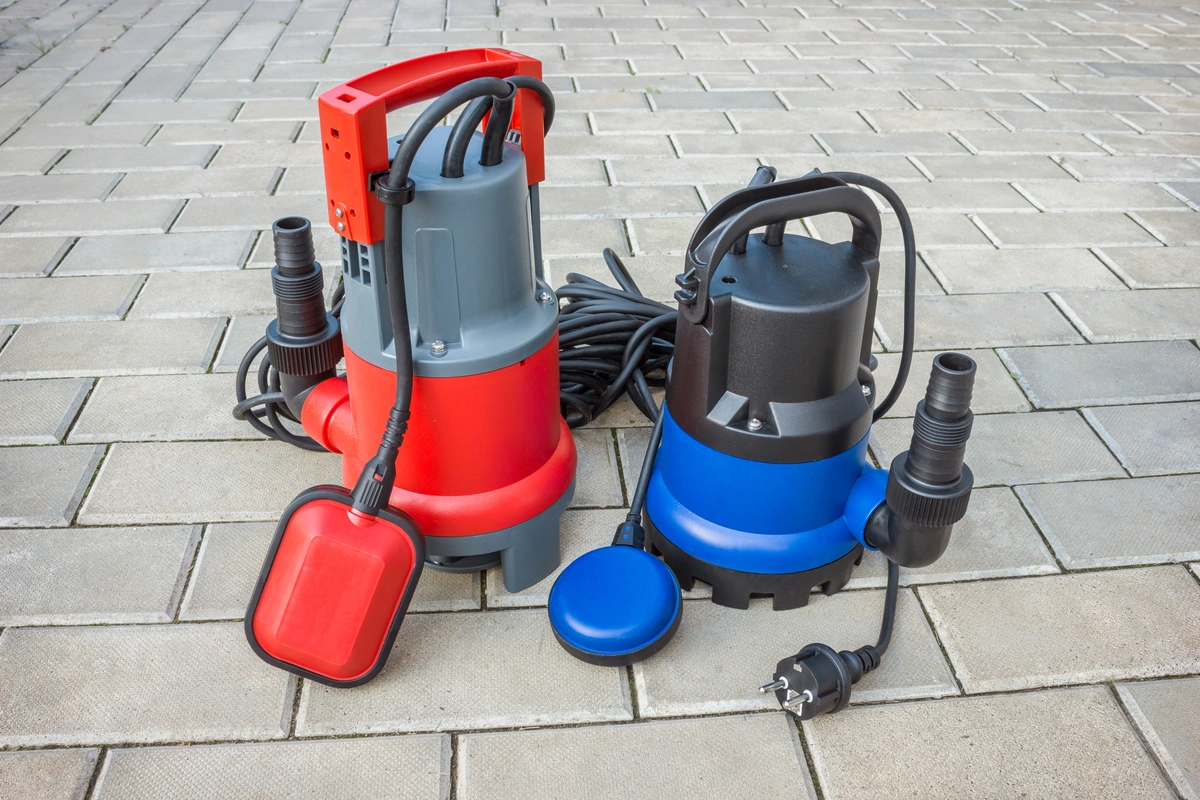
- Sump pump and basin: The heart of your sump pump system.
- PVC pipes and fittings: For directing water away from your home.
- Check valve: Prevents water from flowing back into the sump pit.
- Gravel: To help with drainage.
- Cement: For securing the sump pit in place.
- Hacksaw and PVC cement: For cutting and joining pipes.
- Tape measure and level: To ensure everything is properly aligned.
- Safety gear: Gloves, goggles, and a mask to protect yourself during installation.
#2–Choose the Right Location 🏡
Selecting the correct location for your sump pump is vital. Here are some key considerations to keep in mind:
- Lowest point: Place the sump pump at the lowest point in your basement to ensure it collects water effectively.
- Accessibility: Make sure the sump pit is easily accessible for maintenance and repairs.
- Distance from the wall: Keep the sump pit at least six inches away from the basement wall to avoid potential structural issues.
#3–Dig the Sump Pit 🕳️
Now, it’s time to get your hands dirty. Dig a hole for the sump pit, ensuring it’s deep enough to accommodate the basin. Here’s how to do it right:
- Use a tape measure and level: Measure the depth of the sump pit basin and mark it on the wall.
- Dig the pit: Using a shovel, start digging the pit, following the marked guidelines. The pit should be deep enough to accommodate the basin and allow room for gravel.
#4– Add Gravel and Secure the Basin 🪣
Once the pit is dug, add a layer of gravel to the bottom. This helps with drainage and prevents the pump from sitting directly in mud. This is because it creates a space beneath the sump pump basin where excess water can collect without the risk of the pump sitting directly in water or mud.
Once the gravel is laid, place the sump pump basin into the hole and ensure it sits level. This is essential to prevent any tilting or shifting of the basin during pump operation, which could result in malfunction or damage. Use cement to secure the basin in place.
#5–Install the Pump and Attach the Discharge Pipe ⛽
Now for the exciting part–time to install the sump pump itself! Below are a couple of tips to ensure you install it correctly.
- Place the pump: Position the sump pump inside the basin, ensuring it’s level.
- Attach the discharge pipe: Connect the discharge pipe to the pump. The pipe should extend away from your home, directing water away from your foundation.
#6– Add a Check Valve and Finish the System 🔄
A check valve is crucial to prevent water from flowing back into the sump pit. Make sure to install it above the pump discharge pipe.
- Secure the check valve: Attach the check valve to the discharge pipe above the pump.
- Complete the system: Connect the remaining discharge pipe sections as needed to ensure proper drainage away from your home.
#7–Test the Sump Pump and Adjust Settings 🧪
Before considering your installation complete, it’s essential to test your sump pump. We’ve provided a few tips below to help you test it effectively.
- Fill the pit: Pour water into the sump pit to trigger the float switch.
- Observe operation: Ensure the pump activates, pumps the water out, and turns off as it should.
- Adjust settings: Depending on your pump model, you may need to adjust the float switch settings to control when the pump turns on and off.
#8–Seal Gaps and Clean Up 🧽
Sealing gaps around the sump pit and discharge pipe is essential for maintaining a dry and secure basement environment. It prevents moisture and soil from infiltrating your basement, enhances the efficiency of your sump pump system, and contributes to the overall functionality and aesthetics of the space.
Once you’ve sealed the gaps, make sure to throw out excess materials and cleaning up the work area ensures that your basement is not only dry but also organized and safe for future use.
Maintenance and Additional Tips
Your sump pump installation is complete, but the work doesn’t end there. Here are some maintenance tips and considerations to be mindful of:
- Regular checks: Test your sump pump at least once a year to ensure it’s functioning correctly.
- Backup power: Consider a battery backup system to keep your sump pump operational during power outages.
- Keep the pit clean: Remove debris and sediment from the sump pit to prevent clogs.
- Professional help: If you’re unsure about the installation process, consider hiring a professional to ensure it’s done correctly.
As a quick recap, the installation of a sump pump is just the beginning of a commitment to keeping your basement dry and your home protected from water damage. Regular maintenance and proactive measures are essential to ensuring that your sump pump operates efficiently. This will ensure it’s reliable and provides peace of mind during heavy rains and potential flooding events.
By staying on top of these maintenance tips and considerations, you’ll maximize the lifespan of your sump pump and keep your home safe and dry for years to come.
Install Your Sump Pump Like a Pro
The installation of a sump pump in your basement isn’t just about preventing water damage; it’s about gaining peace of mind, protecting your property, ensuring the well-being of your family, and potentially increasing your home’s value. With this system in place, you’re well-prepared to face heavy rainfalls and storms without fear, confident in the knowledge that your basement and the area around it is a dry and secure space where your valuable possessions and cherished memories remain safe and sound.
At A.J. Alberts, we understand how stressful it is to deal with a swampy basement. That’s why we want to help you out with all of your plumbing needs–and yes!–that includes a sump pump basement installation! Installing your sump pump doesn’t have to be a DIY project. For that expert touch, give us a call or set up an appointment by clicking here.


